With Halloween coming up later this month, we are all looking forward to some tricks and lots of treats for sure! Instead of just collecting candy this year, why not pull out your slow cooker and try making your own? You don’t even have to wait until the 31st to try these fun, and spooky treats!
How It Works:
To make chocolate covered gifts and treats, you first have to melt chocolate! Slow cookers are ideal for this. Not only can they melt chocolate, their relatively low cooking temps are ideal for keeping it melted throughout the duration of your project.
Smaller slow cookers work really well for this purpose as do mini dipper slow cookers. The latter most often have just one heat setting and are used for warming items such as sauces and dips. I have had great experiences using them to melt chocolate as well.
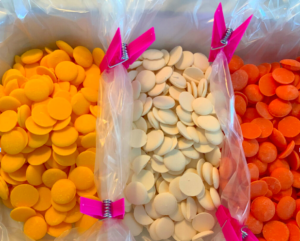
To melt multiple flavors/colors of chocolate at the same time, divide a larger slow cooker, such as the casserole Crockpot, into different sections using small slow cooker liners (see picture below). This turns your slow cooker into a fun dipping station. Of course, a multi-pot slow cooker, would work perfectly here as well.
Dipping can be messy business! And, while tons of fun, younger candy makers will need extra help and supervision as the chocolate and the slow cooker will be hot to the touch.
What You Need To Get Started:
1. Chocolate! There are different kinds of chocolate out there that can be melted. Chocolate bark and chocolate chips will work for this. However, dipping and decorating is easiest using melting wafers which are specifically made for coating. They are sold in many markets, craft stores and all purpose stores (like Target) and come in just about every color of the rainbow. Click here for a variety of  chocolate coating options.
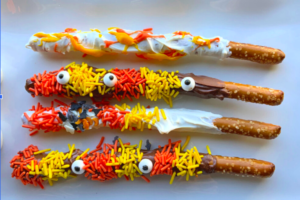
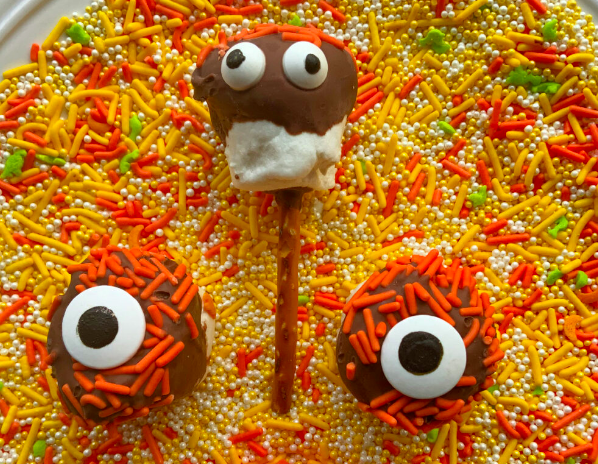
2. Fun stuff to dip in chocolate! The possibilities are endless, so get creative here! Pretzels, marshmallows, strawberries, bananas, graham crackers and caramels are a good place to start, but the sky’s the limit! If you dip something cool, yummy and different, please share in the comments below!
3.Chocolate molds If you just want to make creepy shapes and scary bites, you can also use your melted chocolate right in molds specifically made for this purpose. Here are my favorite Halloween molds.
4. Toppings and candy decorations: Sprinkles, crushed candy, candy googly eyes, creepy gummy worms and candy corn will all work well for starters.
5. Mixing spoons or rubber spatulas (you will need one for each color of candy coating).
6. Parchment or wax paper to rest your creations on to allow them to cool.
How To Melt & Mold Chocolate
1. Place a slow cooker liner (or liners) in your crockpot as shown and add a bag of melting chocolate. The amount you use will depends on the size of your slow cooker. In the casserole cooker shown, I was able to fit 2 – 12 ounce bags in each section. In the lil dipper, I only used about 6 ounces.
2. Put slow cooker on low and allow chocolate to melt. Stir chocolate every 10 minutes or so to aid with the melting process and avoid potential burning. Each slow cooker is a little different so exact times are hard to pinpoint. As a guideline, my mini slow cooker dipper was ready to go in about 20 minutes, The casserole crock took closer to an hour, particularly the middle section. So, it can really vary! Once the chocolate has melted, turn your slow cooker to warm (if you have this setting).
3. Carefully dip each treat (pretzel, etc) in melted chocolate and place on parchment or wax paper to cool. If you plan to decorate with additional candy this needs to be done before the chocolate has a chance to cool and re-harden.
4. If you are dipping fruits such as strawberries or grapes, make sure they are washed and VERY well dried before dipping to ensure the chocolate will adhere.
5. Stir chocolate occasionally during the dipping process to make sure it remains evenly heated. If it gets too hot and starts to bubble or burn, turn the slow cooker off for a few minutes to cool and resume on a “warm” rather than “low” setting. If the chocolate starts to harden or get lumpy, stir to bring back creamy consistency.
6. Remember to have fun! The process is more important than a professionally looking product. It will all still taste delicious, no matter how it looks!
The Most Important Step
Once your candy has had a chance to cool and harden. Take pictures!! Spooky candy treats are fun to share. If you plan to share your creations on Instagram, tag @the_lazy_slow_cooker so we can see them! Then… ENJOY!!!! Happy Halloween!
First Published in September 2020, Updated October 2022


