You might not always love drizzly days, foggy mornings or snowy nights. However, the weather gives you the perfect excuse to jump right into some fun weather experiments with your kids. Whether you have a preschooler, elementary-aged student or middle schooler at home, you can easily get the younger ones involved with a few weather science projects.
Start loving every bit of sun and precipitation that nature provides. Try the following experiments to promote “Aha!” moments in your household.
1. Forecast With Pine Cones
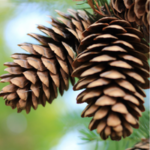
Do you know that pine cones can tell you what’s happening with the weather? A pine cone opens or closes based on the humidity in the atmosphere. When it’s going to be a dry day, the pine cones open wide. Rain in the forecast? Pine cones will close to more effectively protect their inner seeds.
Collect several pine cones with your kids. Place them outside in a location you can check them daily, like a window sill or on a screened-in patio. Then, watch and record what the pine cones look like each day at the same time. You may want to take pictures to compare.
Questions to ask during this fun weather science project:
- Do different pine cone types react differently to the weather?
- Did some pine cones not react at all?
- How much does a pine cone open or close?
2. Whip Up an Indoor Rain Storm
Outside, you might have blue, bright, cloudless skies. Inside, though, you can cause a bit of rain to fall. To help your youngsters understand why rain occurs, try making rain indoors. All you need are ice cubes, a big glass jar, paper plates and some water.
Boil the water on the stove or in the microwave. Pour the hot water into the jar until it’s about a third to half full. Place the paper plate on top to seal in the heat and steam. Then, place several ice cubes on the top of the plate.
At this point, your kids will have to exercise a bit of patience. The hot air in the jar will meet the cold surface of the plate. At that point, the vapor molecules will cool to moisture droplets. Eventually, those droplets will “rain,” falling back into the water.
As you’re using this experiment to teach kids about weather, answer the following:
- How does this principle work in the real world, such as when a storm “pops up” on a hot July day?
- Does the amount of ice cubes change the amount of “rain” in the jar? Why or why not?
- What if the water is just medium-hot? Does its temperature make a difference? If so, how?
3. Time a Thunderstorm
Sometimes, youngsters feel a little frightened by the sounds of thunder and the sight of lightning bolts. Help your child understand why these weather phenomena occur by tracking and timing your next local storm. You’ll only need paper, a pencil and a stopwatch, which is available on most smartphones as an app. Oh, and you’ll have to wait until the next storm comes into your area!
During the storm, start the timer every time lightning happens. When you hear thunder, stop the timer. Write down how many seconds it took for the sound to reach you. Generally, sound travels one mile in about five seconds. If you heard the thunder 10 seconds after seeing the lightning flash, the storm would be 10 divided by five, or two miles away.
This weather science experiment takes away the worries many children feel about intense storms, making the experience more fun. And older children will appreciate the way math and science come together seamlessly.
A few things to consider as you track the lightning and thunder:
- How many times did you notice lightning during the storm? Why do you think that is?
- Was the storm moving toward you or away from you? How could you tell?
- How loud was the thunder? Did the loudness change at all as the storm moved through your area?


